Blog

Off Grid Solar Kits Australia – Buyers Guide & DIY Installation
Today, it is entirely possible to experience significant cost reductions by utilising the services of a professional solar firm. This is the approach that most individuals use when they go solar. Do-it-yourself (DIY) installations of an diy off grid solar power kits Australia are an option to consider if you want to minimise the initial expenditures as much as feasible. After all, doing things yourself rather than paying someone else to do them for you will save you money in the long run.
People choose to switch to solar power for a variety of different reasons. Some people are interested in making the transition to clean and renewable energy. Some people are excited about decreasing their dependency on the public electrical grid.

People choose to switch to solar power for a variety of different reasons. Some people are interested in making the transition to clean and renewable energy. Some people are excited about decreasing their dependency on the public electrical grid.
The survey identifies one reason people are going off-grid or changing to solar.
But suppose you want to know the most important reason to go solar. In that case, it’s because you’ll save money. Furthermore, according to a survey conducted by Few on solar energy. The primary motivation for those who have already installed solar or plan to do so is to reduce the amount of money they spend on their monthly electric bills.
What are the benefits and drawbacks of installing solar panels on your own? And what are the steps involved in accomplishing one of these?
I’ll respond to those issues by examining each significant advantage and disadvantage of a do-it-yourself installation of solar panels and then breaking down the process of designing and installing solar panels into six straightforward steps.

Decide on what you hope to achieve with your solar system
What will you hope to accomplish with this system? Monetary cost reductions? Backup power? Freedom from reliance on the grid? What you want to accomplish will decide the type of system that will work best for you, the level of difficulty that the installation will require, and the total cost of the endeavour.
Select the appropriate kind of solar power system.
Your next choice should be the type of solar power system most appropriate for achieving your objective. All the different types of systems share several components, including that they all use solar panels, inverters, mounts, and wiring. However, there are some significant distinctions, and these variances can affect the cost and complexity of the project. A concise explanation of each will follow.
Grid-tie solar panel system
This solar installation taps into the power grid to function as a battery through nett metering. Grid-connected solar power systems offer the lowest initial investment costs since they require less equipment than other solar power systems. The absence of a backup power source is one of the drawbacks of using these systems.
The hybrid solar panel system
A hybrid system keeps a grid connection while incorporating a battery storage solution. Although

hybrid systems cost more than grid-tied ones. They provide additional functionality. Such as backup power if the grid fails and time-of-use arbitrage, which makes up for the higher cost.
Off-grid solar system
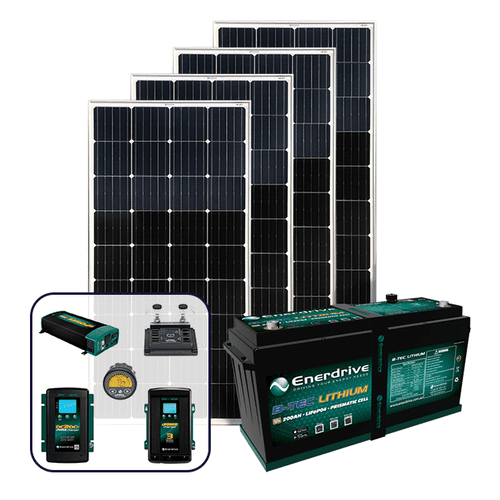
Solar power plants not connected to the grid are called off-grid installations. Because there is no grid to fall back on, the solar system needs many panels and a substantial battery bank to supply the residence’s power requirements 24 hours a day, 365 days a year. This includes the winter months and/or extended periods of gloomy weather. This type of technology comes with the highest price tag. Off-Grid Solar Kits Australia can be as simple or complex as required.
The benefits and drawbacks of installing your solar panels.
Do-it-yourself solar is still a significant and expensive commitment, even though it is less expensive than getting solar with a professional solar firm. Before getting into the process, you should figure out whether or not installing solar panels on your own is the best option.
Cost savings
Installing solar panels in one’s home can save the homeowner thousands of dollars in initial installation fees. A competent solar business will instal solar panels at approximately AUD 2.95 per watt, which is the typical cost. That comes to $12,750 for an average solar panel system with a capacity of 5 kW (5,000 watts).

 On the other hand, a do-it-yourself solar panel kit with a 5 kW capacity ranges from $1.00 to $2.50 per watt. The overall cost of a do-it-yourself solar installation with a capacity of 5 kW ranges from $5,000 to $11,500. I am presuming that the homeowner carries out the work without the assistance of any outside professionals.
Suppose you install your solar panels yourself rather than hiring a professional. In that case, you might save anywhere from $6000 to $10,000. The numbers that have been provided are only the averages. Many factors can influence these numbers for you. Including the size of your system and whether or not you are eligible for the solar tax credit.
Gratification from one’s handiwork
If you enjoy taking on significant and challenging, Do It Yourself tasks. A solar installation might be what you have been looking for. Successful projects require you to draw on many skill sets. Such as the ability to manage municipal systems, financial planning, expertise with power tools, electrical work, and even tax accounting.
In addition, installing solar panels involves several steps, including research, planning, shopping, obtaining permits, installation, electric wiring, and monitoring. This kind of project will keep you occupied for a reasonable time. Suppose you are successful in doing it on your own. In that case, you will unquestionably experience a healthy amount of satisfaction in achieving such a challenging goal.
Damage to the roof, as well as potential threats to individual health and safety
This is possibly the most significant cost risk for a do-it-yourself solar installation. Installing solar panels will require you to drill many holes through your roof. If you drill into the wrong area on the roof, you could end up causing structural damage. If you seal and flash the roof incorrectly, you could have roof leaks and/or mould problems.
An additional consideration is that a solar installation is performed by yourself. It is likely to render the guarantee on your roof null and void. This means that you will be responsible for the cost of any necessary repairs. During a solar installation, do-it-yourselfers put themselves in danger from several hazards, the most significant being exposure to heights and high voltage electricity.

Furthermore, the physical dangers are not confined to the actual installation process alone. Suppose there are any issues with the panels over 25 years. In that case, you will be responsible for climbing back up on the roof and investigating the situation. Worse, your rooftop system could catch fire if the wiring isn’t connected correctly!
A significant amount of time and work will be required.
If you are looking for a serious DIY project, installing solar panels on your own can be lucrative, but only if you are up for the task.
You should probably avoid taking on solar installations. On the other hand, if the extent of your experience with do-it-yourself projects is restricted to the construction of Scandinavian flatpack furniture. It is not only a very time-consuming job, but it also requires a lot of planning and organisational abilities. It will take one and four months to complete a do-it-yourself solar installation from conception to the point where it is commissioned.
There may be no help for defects or warranty claims and a lack of eligibility to get certain benefits.
It may be challenging to provide sufficient evidence to support a warranty claim. In addition, you risk nullifying the guarantee if you do an installation that is not done correctly. If there is a problem with the apparatus, you are on your own to find a solution.
Investigate what kinds of tax breaks, rebates, and incentives are offered in your area. Going solar is far more affordable in several states because of financial incentives and rebates. However, to qualify for certain rebates and tax credits, a properly licenced business must carry out the solar panel installation.

Instructions for installation and the most likely procedure
In the last section, we spoke about the layout and system. Let’s continue the installation procedure by going through the remaining steps in more detail.
Check the rules and regulations about solar energy.
A diverse set of regulations govern the installation of solar panels. They can differ from one state to the next and from one municipal jurisdiction to the next. It is essential to be aware that a licensed professional must install a solar power system in some jurisdictions before the system can be linked to the power grid. If this is the situation where you live, it will not be possible for you to instal a solar system that is grid-tied or hybrid that you have built yourself.
Before you can begin your installation, you will likely need to obtain a construction and a utility permit, even if do-it-yourself projects are legal in your area. In most cases, this will require the presence of a structural engineer or an electrician with a valid licence at the location in question. After that, another series of inspections will need to be passed for your system to be activated and linked to the grid once the installation is finished.
Conceive the system.
A challenging aspect of building a solar panel at home is the design. You want to make sure that all of the following considerations are taken into account by your system:
- Your energy needs
- The weather and average sunshine each month will have a role.
- Solar panel orientation
- Solar panel angle
- Efficacy reduction caused by nature
- Conversion losses
- Shading
- Expandability
- The capacity of the battery and its charging (for hybrid and off-grid systems)

You can see the entire output of the system broken down by month using our solar panel calculator. It takes all of these considerations into account. A suitable system size for your house and highlight the area of your roof that should be utilised. To achieve the most significant possible exposure to the sun. Enter your zip code in the box below to give it a try.
When adding batteries to a hybrid or off-grid system, you must take special care to ensure that the batteries are of the appropriate size. In addition to that, you’ll need to draw up an electrical schematic. A necessary component of the applications you submit for permits. They will function as a sort of blueprint when you place your panels.
Check your work.
Now that you have a system design prepared, it is time to work the numbers, including your expected costs and savings over the panels’ lifetime, typically 25 years. Search online for “solar equipment” to estimate the prices involved. Find the pricing of a complete, all-in-one do-it-yourself solar kit that corresponds to the size of the solar power system you want to instal. This is the most straightforward approach to accomplishing this task.
Your next step is to calculate the amount of money you will save on your monthly utility bills. Figure out how much your system produces annually. Take that number and double it by the price of electricity in your area. You may get an estimate of the money you will save on your utility bills.
You can now compute the return on your do-it-yourself solar panel project now that you have the cost and savings figures. Your total financial savings can be calculated as the difference between the avoided utility expenditures (such as lower energy bills) and the cost of the solar equipment. The formula can be broken down as follows.

Start getting permits if needed for the type of system you propose.
You are now prepared to get your hands dirty and instal some solar panels. But hold on, don’t forget about those pesky laws and ordinances that we discussed in the first step. Before we can get started on any work, we need to go back and look at those. To start, make a list of all of the permission processes necessary by the state, your utility, and your authority having jurisdiction over the matter.
Before beginning any work, you need probably apply for a building permit and permission for the utilities. This will call for an inspection to be carried out by an electrician or a structural engineer. Be sure to adhere to all requirements to guarantee that your installation complies with the code and is legal.
Pick a vendor, and then go shopping for your supplies.
The following is a list of all of the components that should be included in your solar installation:
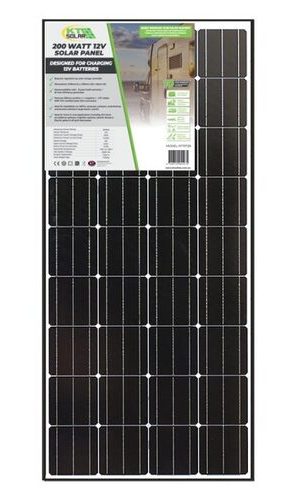
- Solar panels
- Solar inverter
- Mounting and racking apparatus and supplies
- Wiring as well as other electrical components and supplies
- Energy storage device (for hybrid and off-grid systems)
- Charge controller (required for some battery systems)
Locating a comprehensive do-it-yourself solar panel kit that contains all the necessary components is the simplest thing you can do. If this is not the case, you will be faced with the arduous chore of selecting individual members for elimination from consideration and then determining whether components are compatible.
We highly recommend that you examine the product reviews on SolarReviews while deciding between different kits. This will ensure that you are purchasing from reliable manufacturers.
When selecting a provider, go for one that provides lengthy warranties and excellent customer service after the transaction. I would prioritise both of these aspects more than the price because you would interact with the vendor rather frequently. To receive technical help and maybe also receive warranty coverage.
Install the photovoltaic solar cell array.
You should have successfully applied for all of this stage’s relevant permissions and approvals. You should have also accepted the delivery of your solar equipment. The panels should be put in place at this point.
The actual particulars of the installation will be determined, in large part, by the type of system and the components you choose to use. Direct current (DC) to alternating current (AC) power conversion is accomplished with the help of microinverters in the grid-tied system that I will describe in the following paragraphs.

Installation of racking and mounting for solar panels is the first task.
Utilize a measuring tape and a chalk line to pinpoint the precise location on your roof where the rack storage system will be built. The next step is to inspect the roof for solid enough sections to drill into to install lag bolts. Use a stud finder equipped with AC detection to avoid accidentally drilling through an electrical wire.
Before you screw the lag bolts, you must waterproof the seal by caulking the holes and installing flashing. After the lag bolts have been prepared, the L-feet can be attached to the rails, and then the rails can be locked. This method is for a system that uses roof mounts, which has been explained here. Consider ground mounts as an alternative to attempting an installation on your roof if it does not meet the requirements.
Join the microinverters together.
Now we will discuss the microinverters. These are some small boxes that will regulate the output of each panel. You will use the bolts given to attach them to the rails. Each box will have a positive wire and a negative wire coming out. These wires will need to be connected to create a series connection for each array.
Establish a grounding wire connection, then instal the roof junction box.
Grounding can be done by stringing the proper gauge’s copper wire between the rails. This is a crucial safety measure that will assist in dissipating any abnormalities that a fault or a lightning strike may have generated.
To instal a junction box, you will need to make a hole in the ceiling using a drill. You will need to feed the trunk cable from each solar array into the junction box for more than one solar array. You can connect the power generated by the solar panels to your home.
Install the photovoltaic cells.
The panels need to be hoisted up onto the roof at this point. If your roof is particularly steep, you might want to consider enlisting another person’s help for this stage of the project. And while you’re in that position, don’t forget to wear a safety harness! Each module measures around 165 cm by 99 cm, which is a size that can be difficult for a single person to carry on their own.

The solar panels must now be fastened to the mounting rail to continue. Before laying them down flat, you must ensure the wiring is in order. Clip or zip-tie the negative and positive DC wires attached to each solar panel, so they do not touch the roof. After the cables have been tucked away, attach them to the microinverters.
In the following step, you will secure the solar panel by attaching the included mid-clamps to the railing on each side of the board. Install solar panels with end clamps at the end of the rail; they keep the panel in place but are also less apparent from the ground.
Setting up the solar panels’ connections.
Now that the solar panels are finished, it is time to connect them to the house so that they can begin producing electricity. To accomplish this, you will need to instal the following:
- A conduit
- The box is located outside the building.
- A disconnect box in case of emergency
A connection is made between the junction box and an emergency disconnect. The wires will be transported through the conduit from the roof junction box to the external junction box. This safety feature allows you to turn off your solar panel system swiftly. It is a function that is necessary for many different jurisdictions.
Both the external junction box and the emergency disconnect box should be weatherproof. They are situated in an area that is not only easily accessible but also makes it possible to connect quickly to the primary electrical panel of the house. After exiting the emergency disconnect, the wires enter the primary electrical panel of the house. Your solar panel system is now complete, but there are a few more hurdles to leap through before turning it on. And begin collecting energy from the sun.
Perform the final inspection, connect your system to the grid, and turn on your system.
When your installation is finished, you should make arrangements with the local authorities for it to be inspected. The inspector will determine if the system complies with local legislation and whether its design is consistent with what was outlined in your blueprints. The system will need an electrical examination to comply with the applicable building codes.
After demonstrating that you comply with the regulations, you will be able to apply to connect to the grid. A second metre or a bi-directional (or nett) metre will replace the one you already have if you request this service from your utility company. The bi-directional metre can record your home’s power exported to the grid. Which will allow you to obtain credits on your monthly power bill.
To determine whether or not your photovoltaic system is producing electricity. Launch the solar monitoring app that came with your inverter (these days, practically all inverters come with one). You can now commission your system if it has satisfied all of the standards imposed by the state, the municipality, and the utility company.
Solar power may be pretty lucrative whether you do it yourself or not.
Congratulations on reading through this long blog entry! It indicates that you are committed to switching to solar energy, a journey that I am confident you will find immensely gratifying. Installing solar panels will make your point more independent, lower your electric bills, and minimise the number of carbon emissions you produce. Going the do-it-yourself (DIY) route is an option worth considering if you have a significant amount of spare time and skill.
However, suppose the thought of installing solar panels on your own seems like more than you can handle. You shouldn’t worry because many solar installers have excellent ratings and can perform the work for you, whether you plan to build the system or hire a professional. We strongly encourage you to check out a solar calculator because it will suggest a system that will completely offset the cost of your monthly power bills.
Disclaimer of legal responsibility and safe electrical practises in general.
To enhance your knowledge of the fundamentals of electricity, electrical circuitry, entertainment component circuitry, and any other types of wiring. This website is strictly to provide information only! IF YOU DO NOT HAVE THE REQUIRED KNOWLEDGE AND UNDERSTANDING, DO NOT ATTEMPT ANY WIRING OF ANY KIND. Otherwise, there is a risk of injury to persons, possibly even death, and damage to or property loss.
WARNING
Suppose your project is not used or built correctly. In that case, electricity can cause severe harm or even death and various loss or damage to property. Because of this, electricity must be treated with extreme caution. Do not attempt to complete any electrical work if you are uncertain about what you are doing. Instead, DO THE RIGHT THING AND HIRE A QUALIFIED SPECIALIST TO DO THE WORK FOR YOU.
NEVER EVER CONDUCT WORK AROUND LIVE VOLTAGE. Before working on electrical circuits, always ensure the power source is turned off.
When working with electricity, you must ALWAYS READ AND FOLLOW THE INSTRUCTIONS AND GUIDELINES PROVIDED BY THE MANUFACTURER. Always follow the rules and regulations relevant to your location regarding electrical work.
You expressly hold “www.ballaratsearch.com.au” harmless for any property damage, personal injury and/or death. Or any other loss or damage may result from your actions by utilising this site and giving the information. This is because you are using this site and the information provided.
This information is being made available to anyone to use it in any way they see fit! www.ballaratsearch.com.au and all parties associated with it are not responsible for using this information by any party, particularly those who lack sufficient skill or knowledge to perform these steps safely. The user is solely responsible for any hazards created due to using this information.


3 comments on “Off Grid Solar Kits Australia – Buyers Guide & DIY Installation”